Thursday, September 30, 2010

Blue and White Mosaic Side Table

When I look back I think I must have been out of mind to have picked up this little beauty. I think it was just one of those moments where ya just can't find anything else and desperation kicks in. God forbid I should leave the flea market with nothing. Silly I know, but it just feels like a terrific waste of time if I go home empty handed. So home it came. Lovely right?


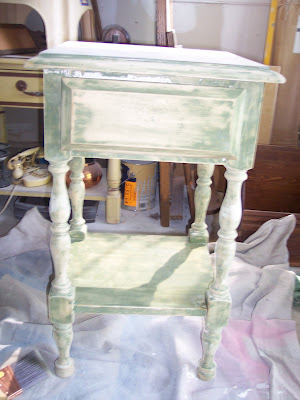
 This was after I applied citra strip to remove a thick coat of chippy, creamy white paint. Stripping turned legs is simply no fun.  That "what was I thinking" moment creeps in again.
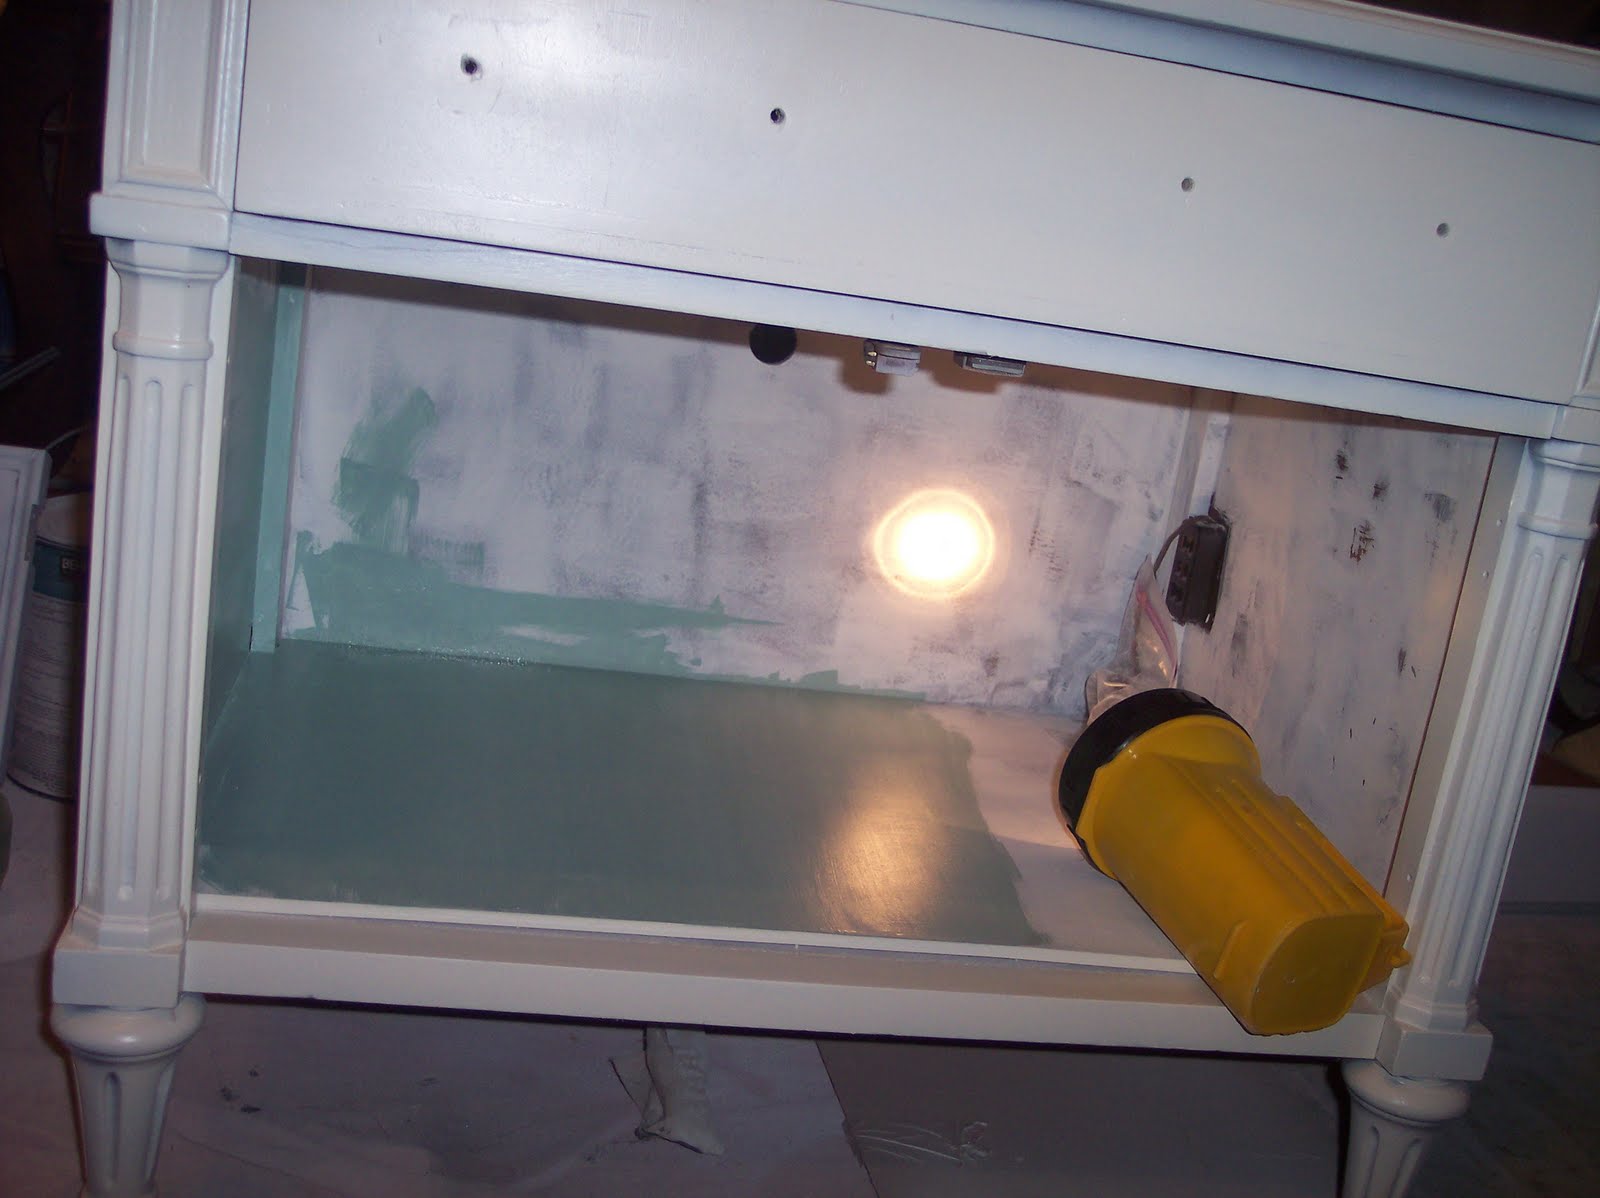
  This is what the drawer front looked like halfway through the stripping process. All together now, ""what was she thinking"????


 Finally after this little guy sat in my garage sucking up space for months I decided to paint it bright white and started collecting blue and white china plates to cover the top. I just love this piece now. Blue and white are one of my fave color combos.....crisp and clean! Look at her now...


I'm linking to...

Photobucket


Furniture Feature Fridays
http://primitiveandproper.blogspot.com/2010/09/piece-of-work-wednesday-link-party_28.htm


Life as Lori


Wednesday, September 29, 2010

Decoupaged Vintage Vanity Tray

I find a lot of these at the flea market. They usually go for about two bucks. Since they are so readily available and cheap instead of doing the typical mosaics which are very time consuming, I decided to decoupage the mirrored surface and spray the gold with a coordinating color. I think these would look really cool hanging in a group with coordinating paper and various shaped trays.


Just have to work on the technique of getting rid of all those air bubbles but you get the idea.

Thursday, September 23, 2010

Beachy TV Console


If you read my last post then you know how skeptical I was of adding this to the "another find pile" which happens to be overloading my garage. Well today I did a couple of before and afters. One being this tv console and the second cleaning out the garage. I actually took a before pic of the garage nightmare but for some reason it was just blank when I uploaded it. No big deal but you would have certainly been impressed especially since we had pushing 90 degree temps and a crazy attack of stink bugs. There were droves of them on the garage walls and everything else including me. That is how much I wanted the garage clean and how much I enjoyed working on this piece.

Before
After

I love the inside with the cord and hole. Perfect for hooking up the tv and hiding wires.


Now I have a question, notice how the top is hazy just not uniform. Some ares are shiny and others appear dull. Wish it was the pic but it's not. Anyone know how that happened? BTW, I sprayed this with Heirloom White. And lastly, the drawer is sticking not due to poor rails, they worked great before I painted. The top rim of the drawer is catching on the top surface of the console. Any advice would be so greatly appreciated :)


Linking to...


http://primitiveandproper.blogspot.com/2010/09/piece-of-work-wednesday-link-party.html


Monday, September 20, 2010

Look what I found...tv console!

I'll tell ya, when I first saw this console table at the flea market I stood there for a minute. It wasn't one of those, I must have this hand in wallet before even asking the price kinda reactions. As I was checking it out the vendor told me it was $15. Not bad I thought, it had great detail and would look awesome with one of those big screen tv's on it which I don't happen to own. None the less, my garage is over run with I must have this finds, so I hesitate. Know the feeling, don't you? It becomes an obsession. So as I contemplated should I, shouldn't I, he then says $12. The 3 bucks difference really wasn't why I hesitated. I just like to have at least a little pathway to get through my garage to the door. Yup, I bought it. Saw that coming, didn't ya? And I am so glad I did. Here is a sneak peek. Check back in a day or so cause I am on a roll with this one. Love when I find something that motivates me as does reading all of your blogs...inspiration at its finest. Thanks, Ladies!

Notice the cardboard where I sprayed wood appliques, my garage is a mess!

Time to invest in some real lighting, no?
I love, love these doors!!! And I always where a mask.

                                                  'til next time...                         

Friday, September 17, 2010

Secretary Desk Redo

A while back I was lucky enough to find this secretary desk at the flea market. I posted about him here....http://uniquelychicmosaics.blogspot.com/2010/05/this-was-my-fab-find-from-two-weeks-ago.html .  I started painting him in the beginning of the summer in my garage.  The heat and humidity kicked in and the combo of me sweating and the paint not drying made me decide to put him on hold. As much as I love summer I couldn't wait for cooler fall days...the start of football season and getting back to this guy. I love the change of seasons, there is always something to look forward to that you haven't done in a long time. Here he is when I first happily got him home. Home for him, the garage.

Great find....yay me! I decided on a creamy white, kinda like heirloom and figured I'd glaze it at the end. Everyone in blog world makes this stuff look so easy. Let me tell you, what a pain in the butt getting into all those little nooks not to mention the glazing nightmare. I'm getting ahead of myself. In all my excitement of finding this guy and loading him in to my car, I didn't even notice the moats on the top where I'm assuming a matching hutch once sat. I used some wood filler which dries very quickly and then sanded it down nice and smooth..


I added a couple of wood appliques with some wood glue. Sprayed the hardware ORB as they say in blog world. I really like the way "she" turned out,  more feminine now. One problem I did have was the attempt at glazing. I really wanted more of a toned down white finish. The glaze just made this girl look dirty. I wiped it off and for now am leaving as is. Anyone know how to get a nice antique finish minus the dirty look? I would love to hear from you! Thanks!

                                                                      
                                             Linking up to...
 The DIY Show Off


 UndertheTableandDreaming


Sunday, September 12, 2010

Breaking China Plates for Mosaics~Tutorial

I've been asked how I break plates for creating my mosaics.  I hope you will find this helpful. Showing someone up close and personal is a lot easier than explaining through words. So bear with me on this! Keep these three things in mind...  
 
1.  Always wear safety glasses.

2.  Start off using a plate you aren't super crazy about.

3.  If it breaks in a place you aren't happy about remember these are mosaics and there really are no bad cuts.

                                   Breaking Plates to Save the Focal

I personally find this easier than saving the rim. You will need a pair of wheeled nippers. I bought mine on Ebay. By far the best brand is Leponnit. They are a little more expensive but worth it. I once cheaped out and bought well a cheap pair. They literally broke while cutting my third plate. I'm all for cheap, in fact my kids call me "The Cheap Mom" but there are times where you need to shell out the extra $ and this is one of them. OK back to plate breaking.


Leponnit Wheeled Nippers


Hold your nippers parallel to the inside of the rim and squeeze


Continue holding the nippers parallel to the inside rim but not under the dreaded foot of the plate. We'll get to that little sucker in a minute.
                                                                                                        
Continue nipping all the way around.
                                                      

       Now you have a nice round focal but underneath is the foot of the plate which needs to be removed otherwise when you lay out your design the focal will be sitting too high. Remember the foot is not your friend! 


In order to get rid of the foot you need to place the nippers over the foot. If the foot is really high well good luck because sometimes the nippers won't open wide enough to get over it. Oh how I hate when this happens!


Just nip away the same way you did when removing the rim. Stay as close as you can to the foot in order to preserve as much of the focal as possible. You of course will be holding the plate with one hand and nipping with the other but since nobody wanted to play photographer over here one of my hands was busy holding the camera.
Here it is although a little blurry.
When it's all cut out there will be some jagged points. You can nip these away until you get it relatively smooth. If you are wondering how come some focals look so smooth well for me I take them to my glass grinder which I've had since my stained glass days which was eons ago.  
   
 Hope you find this helpful. I will do another tutorial on saving the rim a little later.                                                                                                                                                                    
                            

Wednesday, September 8, 2010

Lazy Susan becomes Pretty Susan

I posted about this lazy susan not too long ago. Found her at the flea market, naturally, and the minute I saw her I just knew with some pretty china and stained glass she wouldn't even be recognizable. Here she is before...

                                                              
What I really liked about her were the scalloped dishes. I see so many Susans at the flea but have never come across one quite like this. I spray primed her and then painted her ballet slipper pink. It is by far my favorite shade of pink. I layed out my mosaic design and played around for a while. Finally decided to do each section different yet coordinating.


Grouted her in white but then felt something was missing so I hit Home Depot for a glass knob to be used as a finial. Turned out to be a bit of a pain. You see, I had to drill a hole in the center and find some way to secure the finishing touch. I wound up buying break away drawer handle screws. I used two pliers to break where I needed and then with pliers in hand, holding the threaded part of the screw sans the head, I gave Susan a spin and voila! Screwed on the finial knob and done. Getting long winded over here, aren't I? So, here she is given a new life! Available for purchase on my web site... www.uniquelychicmosaics.com

                                                            I'm linking to...


Friday, September 3, 2010

Shabby French Candle Holder


I found this pastry server, well at least that's what I think it is, at the flea market. It was a silver toned metal (naturally forgot to take the before pic...hate when I do that!) and I sprayed it with white primer then white paint. It came with a glass insert that I decided to mosaic in the shabby chic style. I just love that look! So girly! When I was finished I placed it back in the filigree base and decided white wasn't cuttin' it so I decided on pink instead. I girlied it up a little more with pretty, french cut crystals and little iridescent beads I found at Michaels. I think this would look great with candles on it or a petite pink rose bush.


                                                   I'm linking to... 

I was featured on Life as Lori